
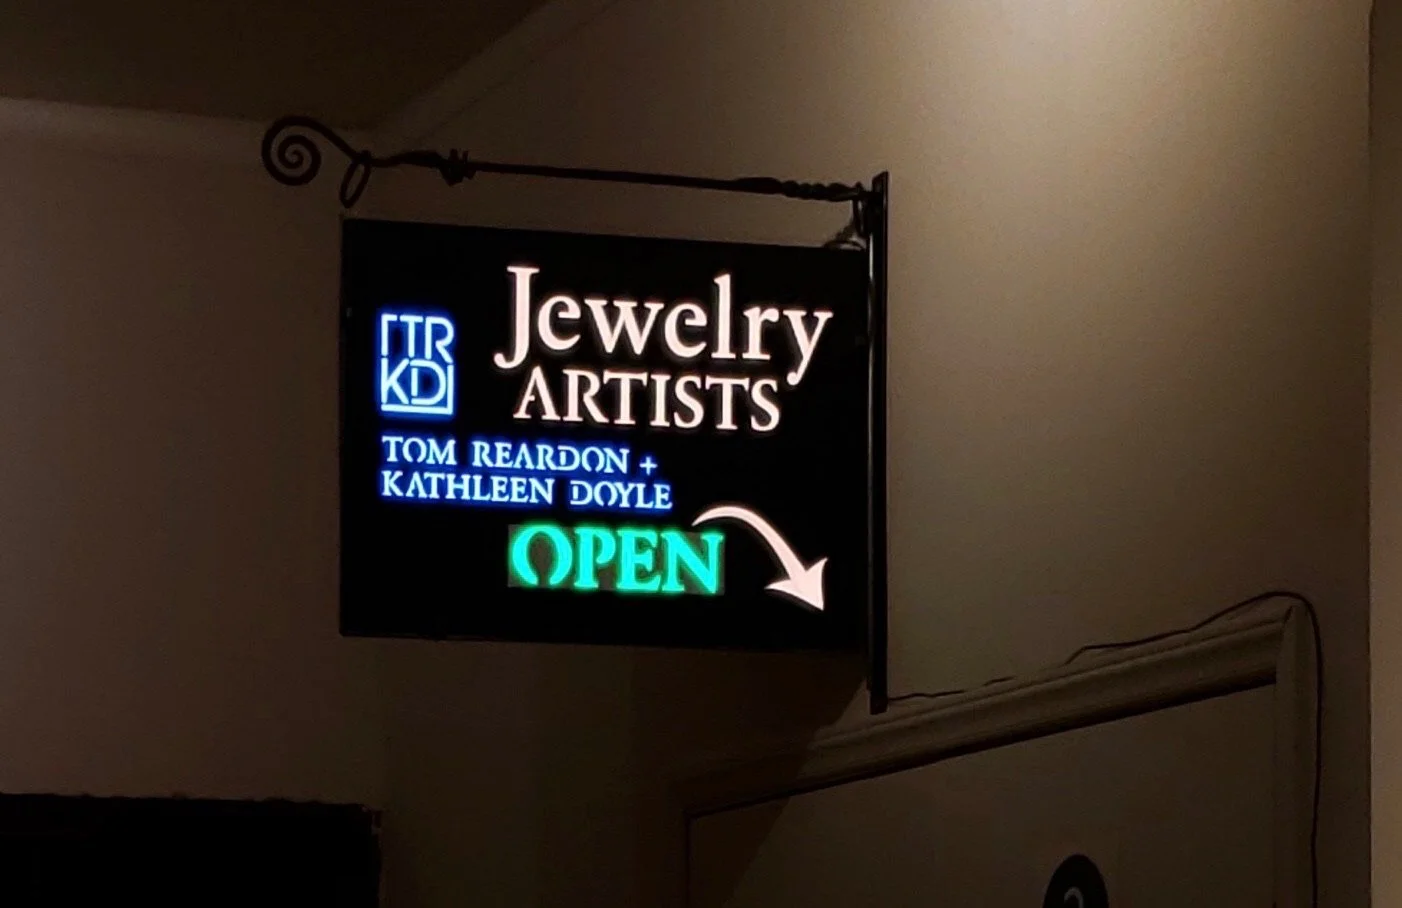
Not So Neon

The completed sign, hung by a blacksmith-created bracket.

The design was created by a graphic artist. The “OPEN” was problematic. Originally it was cut like all the other characters, except it could be turned on for business hours and off when closed. But the white plexiglass had so much contrast against the black face, even when unlit it was prominent. So I cut it blank on the face, and added an under-face to form the letters. It works.
Note, some of the characters and the logo required tweaking, since this is effectively a stencil. See next frame.


The stackup (with OPEN on special backface). Top to bottom, the layers go: face (laser cut veneer), diffusion (white 1/8” plexiglass), backface (laser cut veneer), spacer (carved from MDF by a ShopBot), electronics and LED slots (ShopBot MDF), back cover (veneer, not shown). The interior surfaces were spray painted flat black to control internal reflections. A glossy black was used on the front and back surfaces. The completed stackup was placed in a black extruded aluminum frame.

Carving the Electronics/LED slot layer on the ShopBot.

Completed, the three pockets on top hold the electronics. The other two pockets allow for slack in the wiring. The 1/8” slots refilled with hot MDF dust, which then re-solidified in to a right mess. It took over an hour to clean them out.

Painted, with electronics. That’s an ESP8266 D1 mini on the left; the modules are 48VDC-5VDC converters. The converters each produce 2 Amps at 5V. The three pockets were a little cramped, so I pealed enough MDF for it to fit. There’s no way I’d got through re-cutting the panel for that.

LEDs, unwired. These are side-firing, so they can bend into arbitrary shapes as long as they’re in a flat plane.

Example of wiring. The hookup wire tucked nicely into the slots, but tended to pull up a bit. Fixed with hot melt glue.

I wrote some software for calibrating the LED positions. I could have saved a handful of LEDs but wiring the individual runs, but that would be time consuming. So some of the LEDs are hidden and unused. I did wire the long runs, which would be a waste of LEDs. The calibrator created a C language header file with the individual LED runs.

Closeup of calibration. Since the runs raster back and forth, I had to capture the direction of the run to animate properly. Green is begin; blue is visible; red is end. Unlit LEDs at the stage will be unused.

Close-up of lettering. I glued the veneer to the plexiglass with spray contact cement, mostly to prevent it from curling. I wasn’t able to control the spray enough to prevent strings forming, which had to be painstakingly removed. I think that was a necessary step, I had a few test pieces of cut veneer and quite a few of them cupped and curled.

The stackup, in reality.

Framed. This was before the contact cement, you can see quite a bit of curling, e.g. in the “y” and the arrow head.
Lit
Hung